How to Create the Perfect Tutu Costume for Your Child

Creating the perfect tutu costume for your child can be a fun and rewarding project. Begin by gathering essential materials such as elastic and tulle. Measure your child's waist accurately to determine the length of the elastic. Cut the tulle strips to twice the desired length of the tutu. Knot these tulle strips onto the elastic to form the tutu. Finally, enhance the costume with embellishments like ribbons or sequins to make it unique. By following these steps with care, you can ensure a flawless execution.
Materials Needed

To create a tutu costume for your child, you'll need several key materials. Start with six rolls of tulle, each approximately 25 yards long, in colors of your child's choice. A sturdy elastic band, 1/2 to 1 inch wide, is essential for the waistband; for a 1-year-old, you'll need about 15 inches of elastic.
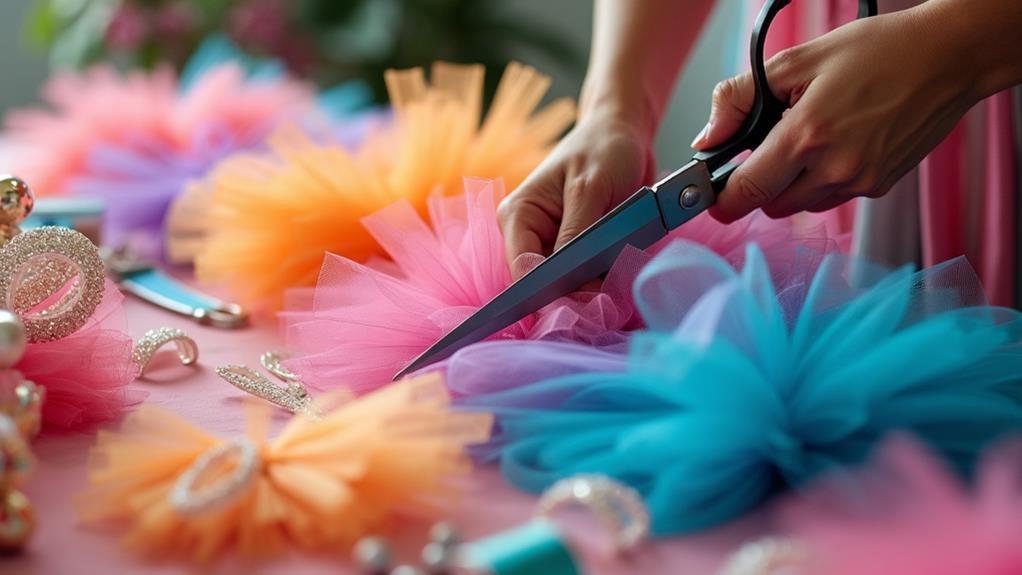
A sharp pair of scissors is important for cutting both the tulle and the elastic. To streamline the cutting process, use two pieces of sturdy cardboard, each 8-12 inches wide and 1/2 inch longer than the desired tutu length. Wrap the tulle around the cardboard, then cut along one edge to create uniform strips.
Consider optional embellishments like satin ribbons, sequins, or flowers to add a personalized touch to the costume. These can be attached to the waistband or scattered throughout the tulle for extra flair. By gathering these materials, you'll be well on your way to creating a delightful tutu costume for your child.
Sizing and Preparation
Accurate sizing and preparation are crucial for a well-fitted tutu. Begin by measuring your child's waist precisely. After obtaining the measurement, cut the elastic waistband to be 1 inch longer than the waist size to ensure a secure fit. This extra inch allows for proper fastening of the ends.
Next, prepare the tulle strips for the tutu. For a tutu with a 15-inch length, cut approximately 48 strips of tulle. Each strip should be double the desired length plus an extra inch for knotting. Use two identical cardboard rectangles, each 8-12 inches wide and 1/2 inch longer than the desired tutu length, to ensure even cutting of the tulle strips.
Adjust the number of tulle strips based on the desired fullness of the tutu. More strips will result in a fluffier tutu, while fewer strips will create a less voluminous appearance. Avoid cutting the tulle strips too thin, as this can weaken the structure and fullness of the tutu.
Cutting the Tulle
Achieving the perfect tutu begins with accurately cutting the tulle. First, measure the waist of the child to determine the length of each tulle strip. Use a cardboard template matching the desired length of the tutu, ensuring the strips are double the final length plus one inch. This method ensures consistent strip lengths, contributing to the overall fluffiness of the tutu.
Wrap the tulle roll around the cardboard template multiple times. The number of wraps depends on the number of colors you're using and the desired fullness of the skirt. For a toddler's 15-inch tutu, you'll need approximately 48 strips of tulle. Adjust the number of strips based on the desired fullness.
After wrapping the tulle around the template, use sharp scissors to cut along one edge. Sharp scissors are essential for clean cuts, as jagged edges can affect the tutu's appearance. Each tulle strip should be cut to the appropriate length based on the child's size, with recommended lengths ranging from 6 inches for infants to 12 inches for older children. This method ensures your tutu will be perfect and ready for assembly.
Assembling the Tutu
Assembling the tutu is where your creation truly starts to take shape. Begin by stretching the elastic waistband over a sturdy piece of cardboard; this makes it easier to securely attach the tulle strips. For each tulle strip, fold it in half and slide it under the elastic, then pull the tails through the loop to create a secure knot. Ensure these knots are snug but not overly tight to maintain the waistband's elasticity and comfort for your child.
Continue adding tulle strips in this manner, spacing them evenly around the elastic to achieve a balanced and fluffy appearance. For a fuller tutu, consider layering additional rows of tulle by making new holes in the elastic and adding more tulle strips. Layering adds volume and enhances the overall look, making the tutu more colorful and eye-catching.
Periodically check the spacing of the tulle strips to ensure even distribution. This attention to detail will make the tutu look well-crafted and professional, perfect for your child's costume.
Adding Embellishments
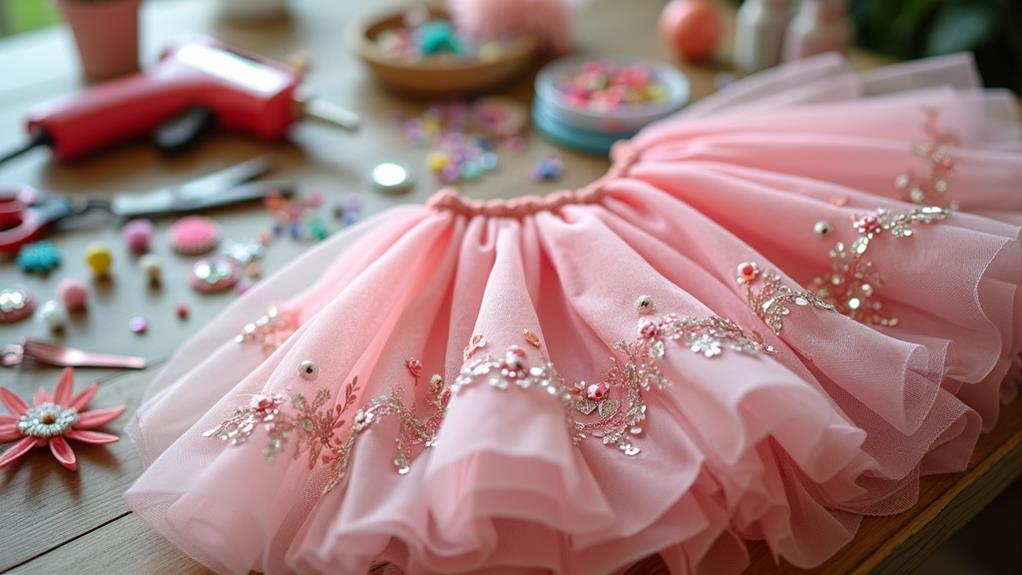
With your tutu now assembled, it's time to make it truly unique by adding embellishments. Choose sequins, flowers, or ribbons in colors that complement the tulle for a cohesive and visually appealing look. Secure these elements with hot glue or a needle and thread, distributing them evenly for a balanced finish.
For a playful touch, consider incorporating LED lights or glitter strips at various intervals. These enhancements will add sparkle and create a fun effect, especially for nighttime events. Simply weave the lights or strips through the tulle, ensuring they are securely in place.
To give your tutu a polished finish, add a decorative waistband. A satin ribbon or fabric in matching or contrasting colors can improve the overall appearance and provide extra support.
Layering can add depth and texture to your tutu. Place smaller embellishments like feathers or beads on top of larger elements for a dynamic, eye-catching look. Thoughtful layering will ensure your child's tutu stands out with a rich variety of textures.